Village and Claim Plans
The Village Plan in Hearthborn is an automatically generated overview of your settlement. As you explore, the client records observed structures and terrain so you can plan construction, organize production, and find important objects without drawing a map by hand.
The plan can include:
- Claim boundaries, including areas extended by claim flags.
- Fences, paths, fields, and buildings.
- Trees and production objects, including furnaces and smelters.
- Village infrastructure, such as the village idol, chicken coops, and rabbit hutches.
- Leatherworking equipment, including tanning tubs and drying racks.
You can also add your own named areas and rename supported objects to make the plan easier to navigate.
Saved fields from Process field appear automatically on both personal and village plans as shaded areas with a thin border, their field number and the saved crop when known. Field numbers are plain digits, without a “№” prefix or a separate name. Hover for the field number, crop and dimensions. To change a number, Shift-click Process field, then use Edit → Field number. The same saved number appears in the field list and on both plans; duplicate numbers are rejected. The overlay uses stable saved grid IDs and is clipped to the selected claim; fields can remain visible in saved surveyed areas even when their plants are not currently loaded. Manually named plan areas are retained.
After a script sowing, the field also shows the planting material's quality: Sown Q 308, or Sown Q 300–308 when qualities differ. The range is derived from the material actually consumed by acknowledged planting batches, not the quality roster's best record. Hover shows how many tiles have known sowing Q. This is the quality used for planting; the eventual harvested crop can differ. Old fields and manually planted tiles without recorded data have unknown quality.
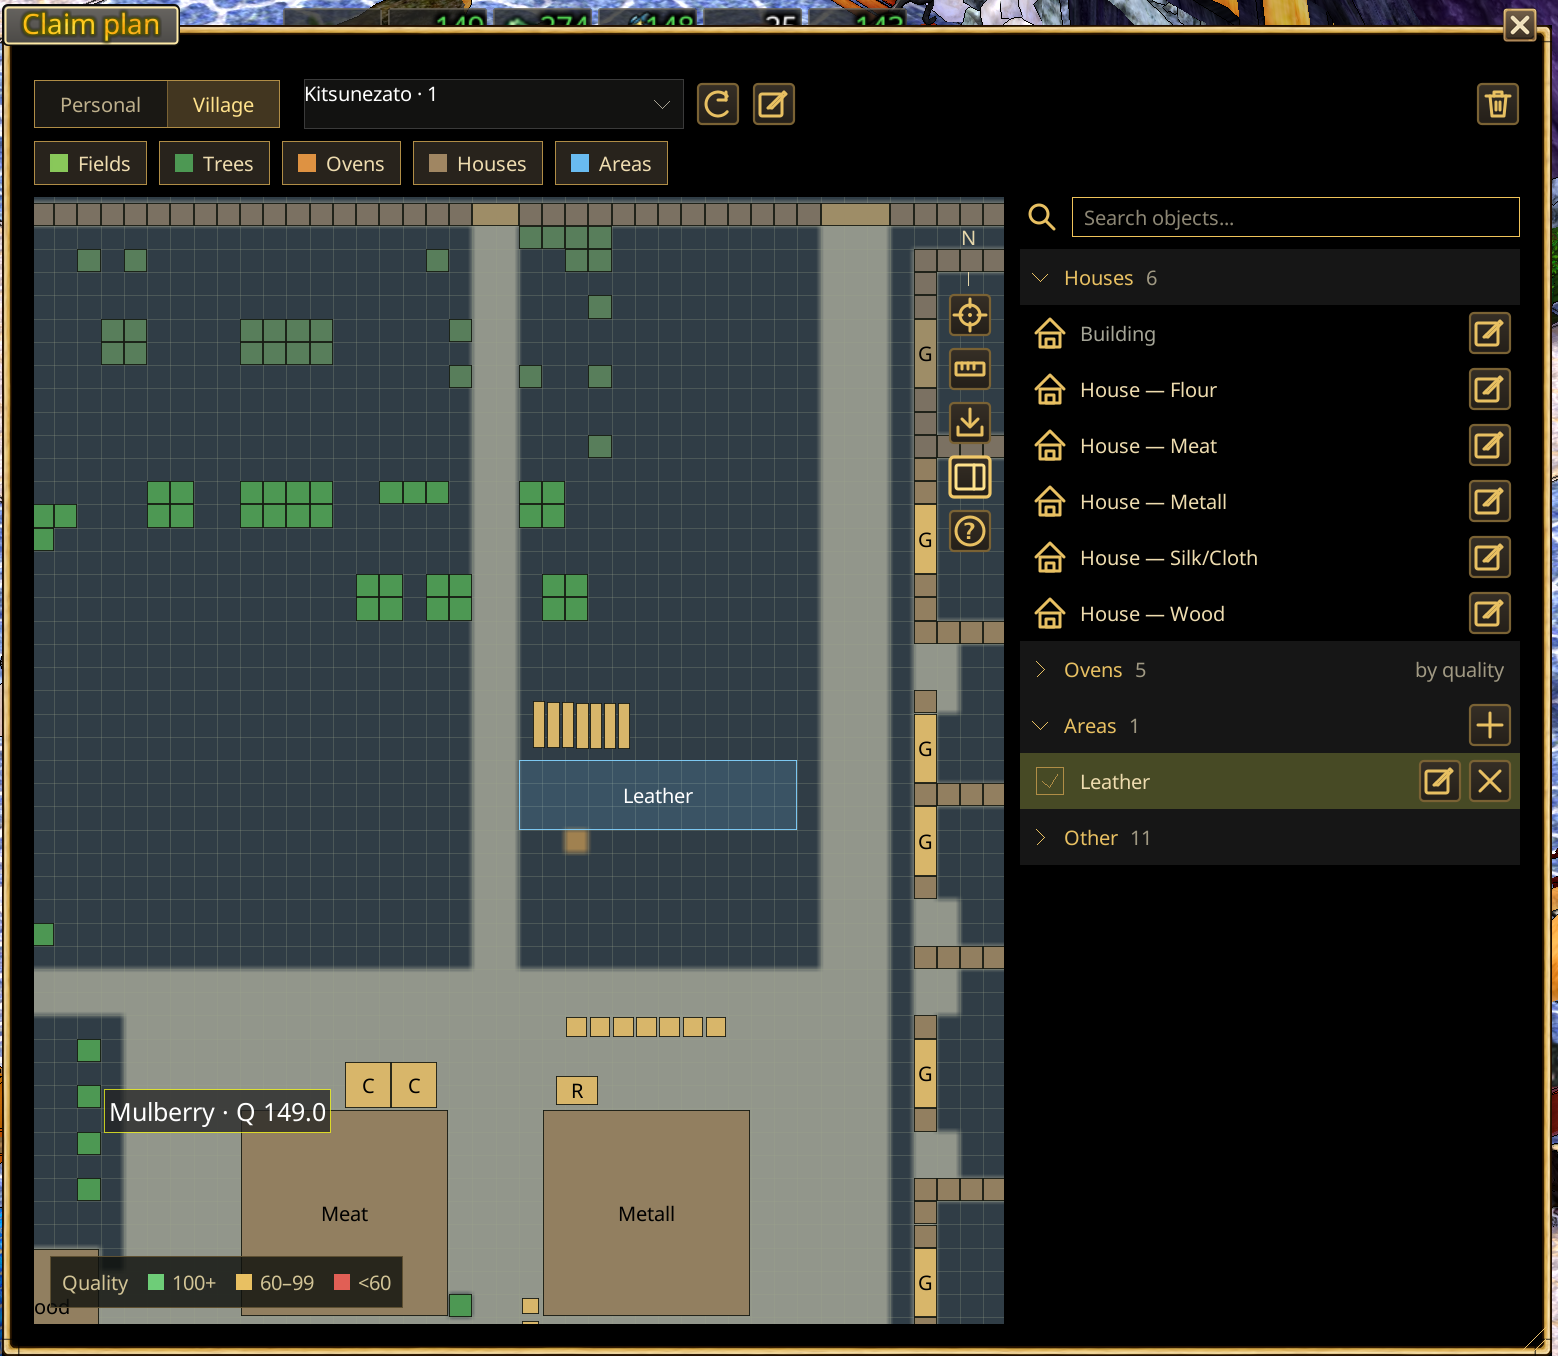
What the numbered examples show
The numbers in the screenshot correspond to these features:
| # | Feature | How it appears in the plan |
|---|---|---|
| 1 | Named areas | Add an area and give it a useful name, such as Leather Storage, to mark where hides or other materials are kept. |
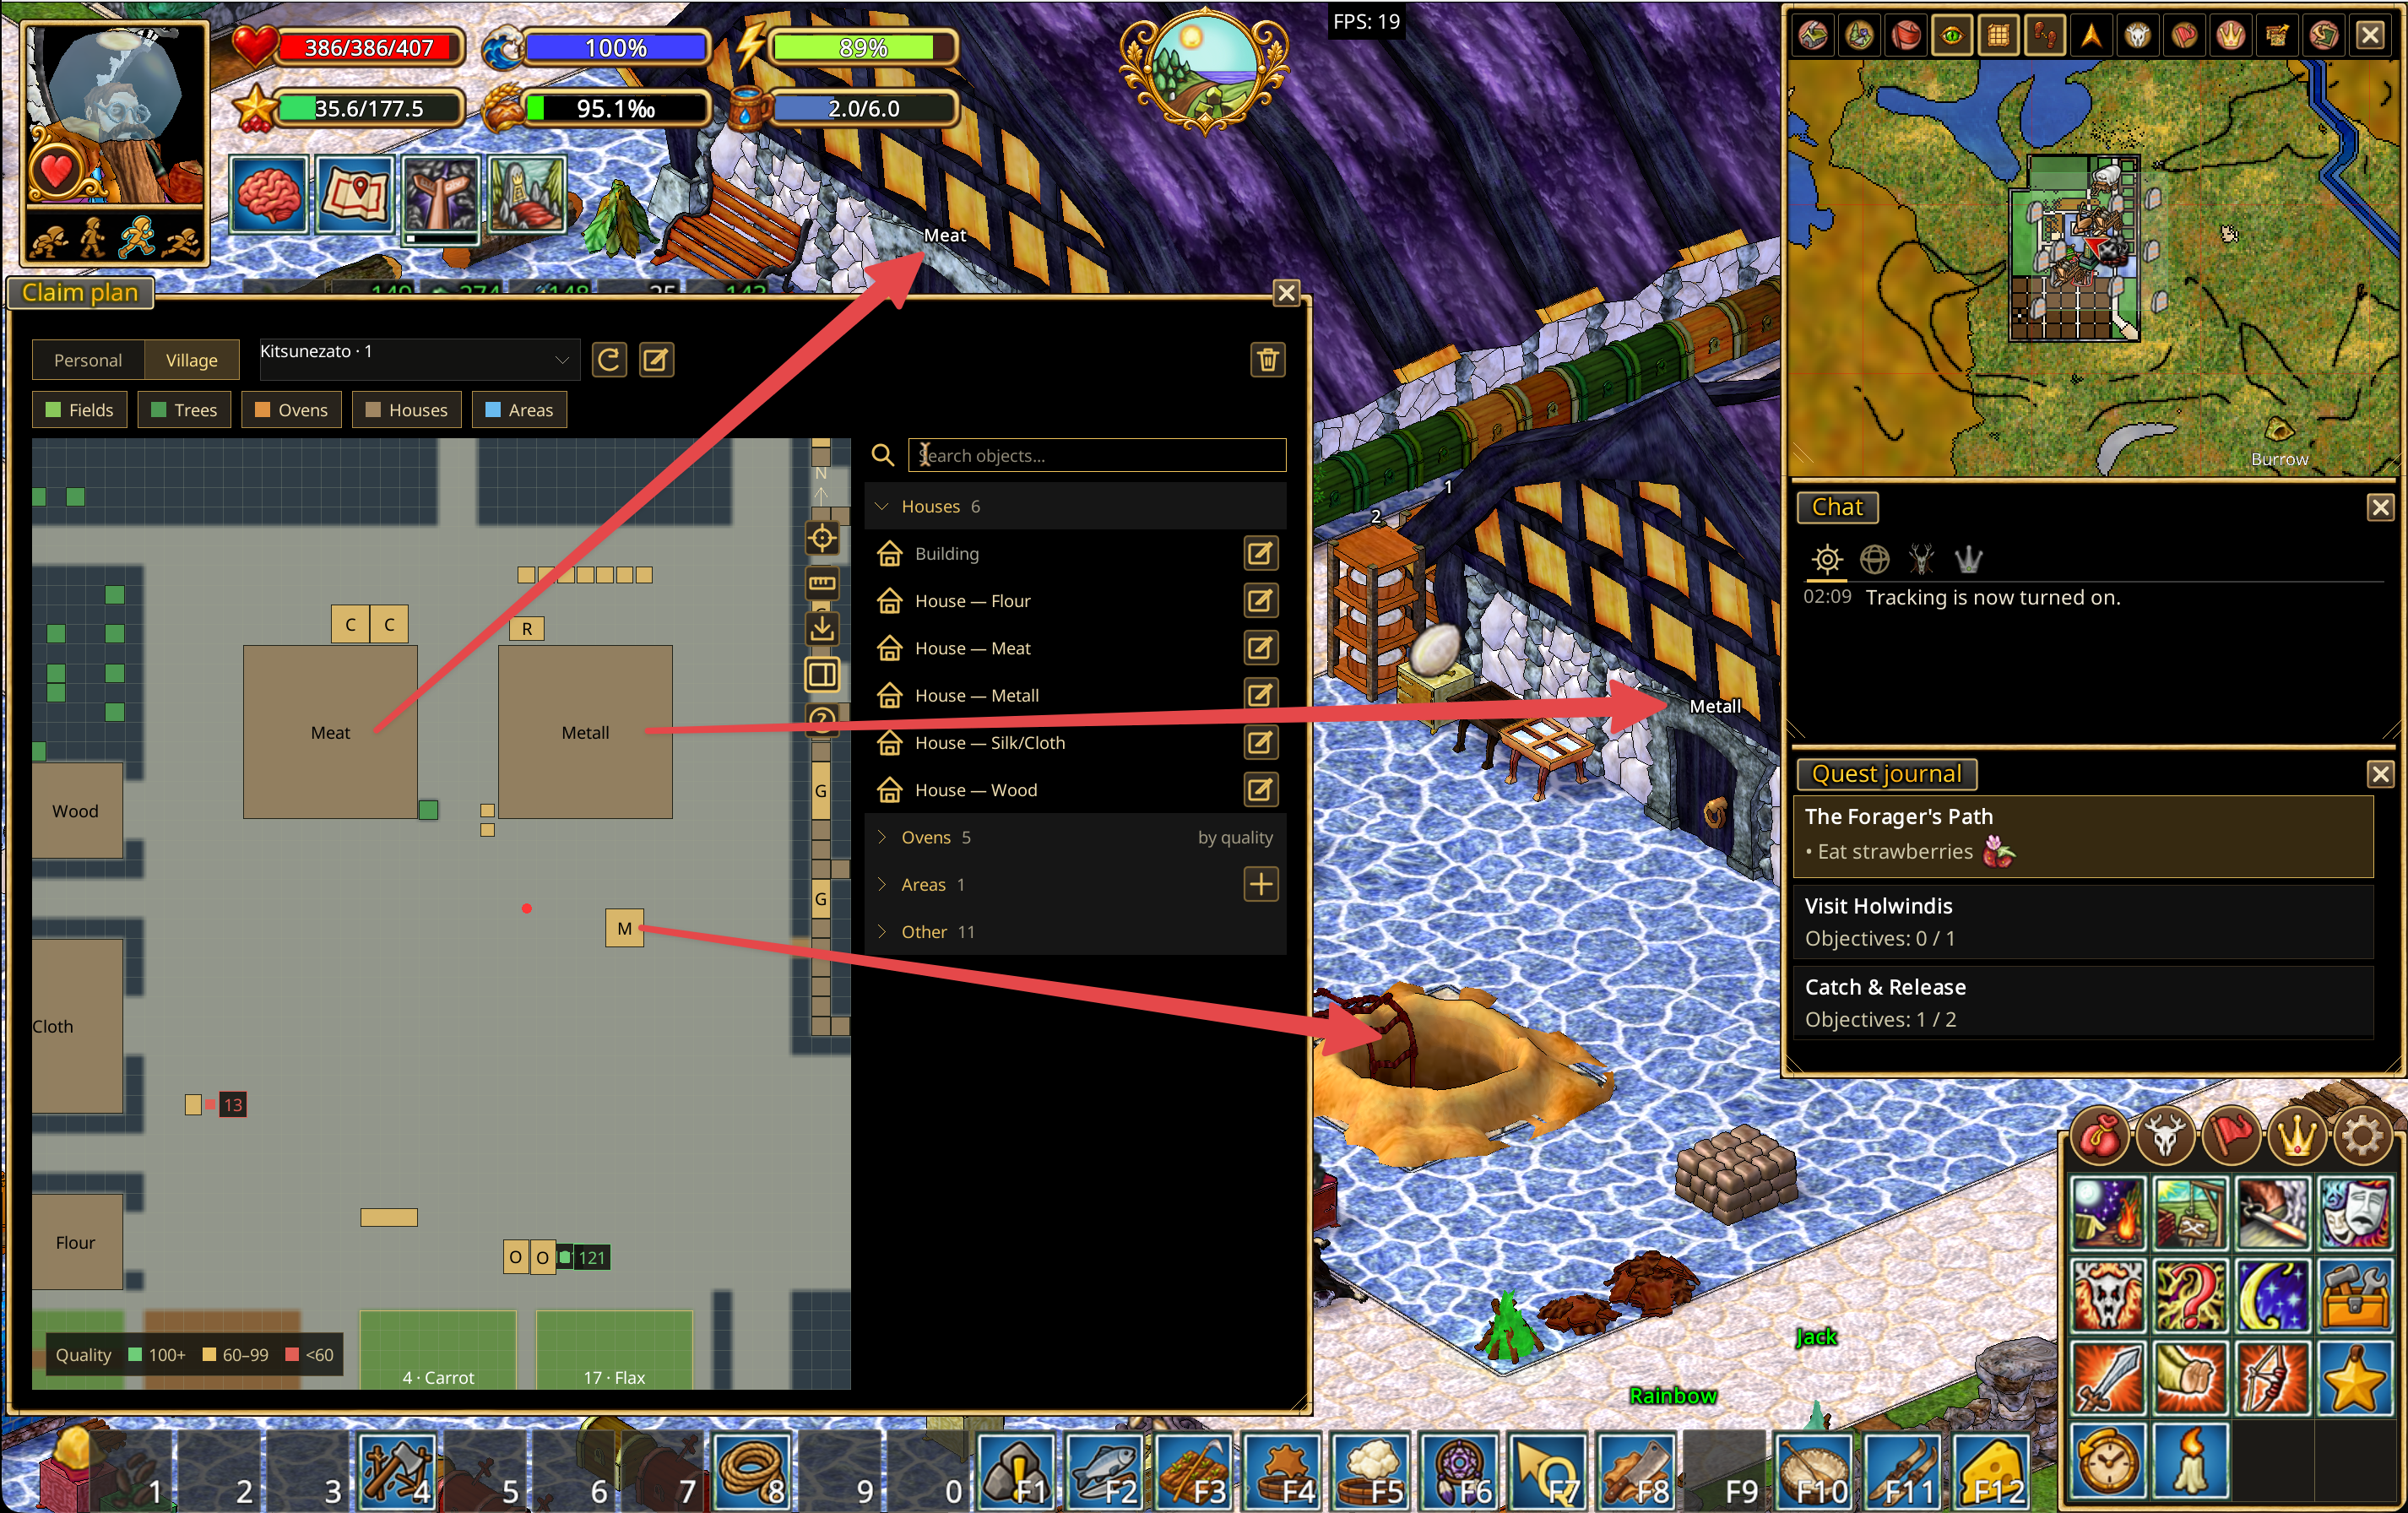
| 2 | Named houses | Rename a house in the plan. The same name also appears above the house in the game world. |
| 3 | Tree quality | Trees recorded in the Quality Journal display their known quality on the plan. |
| 4 | Furnaces and smelters | Production equipment is added to the plan automatically. Its quality is displayed when that value is recorded in the Quality Journal. |
| 5 | Village idol | The village idol is shown as part of the settlement layout. |
| 6 | Chicken coops and rabbit hutches | Animal-keeping structures are represented on the plan. |
| 7 | Tanning tubs | Leather-processing tubs appear in their observed locations. |
| 8 | Drying racks | Leather drying racks are shown as part of the production area. |
The plan window
The top bar has a Personal | Village toggle, the saved-plan list and icons to update and save the plan, rename it and delete it. Their names are in the tooltips.
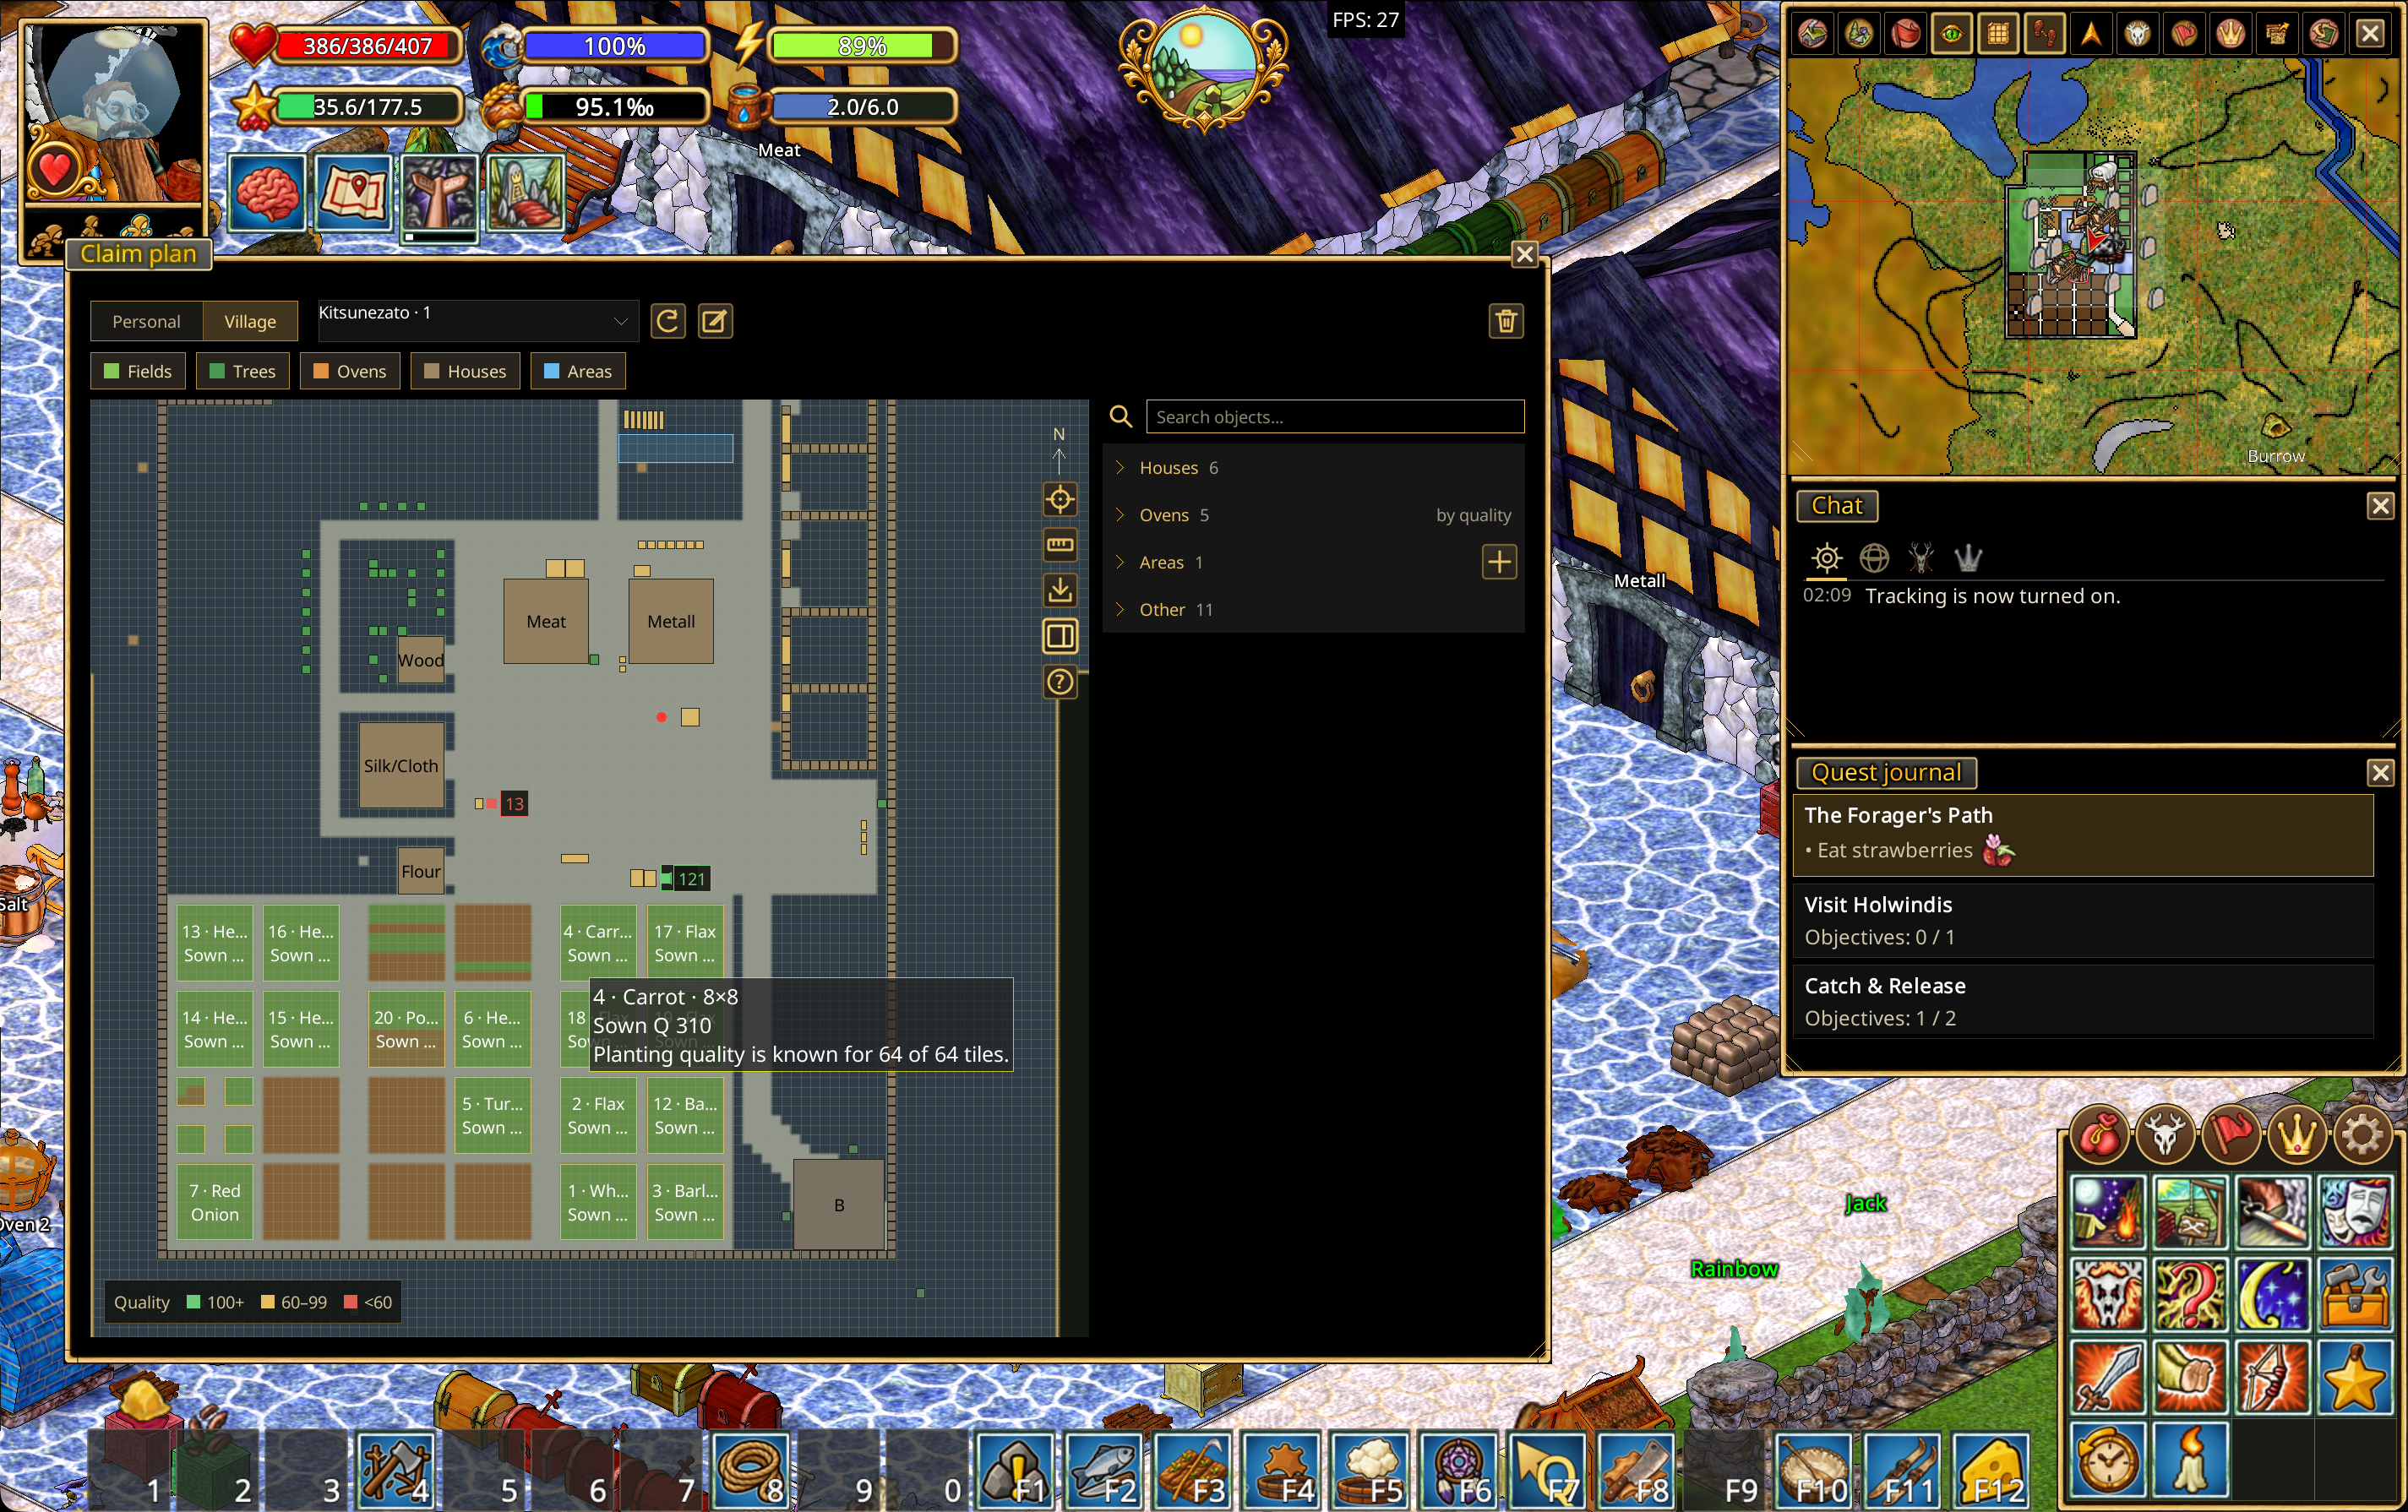
Below are layer chips: Fields, Trees, Ovens, Houses, Areas. Clicking one hides or shows that layer on the map; a switched-off chip turns gray with a dashed border. The choice is remembered. Other objects are always shown.
A vertical icon strip sits on the right of the map: center, ruler (measure tiles), export, object list and help. The quality legend is at the bottom left: green is 100 and up, yellow 60–99, red below 60. Objects with a known quality get a colored mark with the number beside them.
The list on the right is grouped into Houses, Ovens, Areas and Other. A group header collapses on click; the ovens header has a by quality / by name sort toggle and the areas header has a + icon for a new area. An area row has a "show on the map" checkbox, a pencil and ✕. The pencil on any row renames the object in place (Enter saves, Esc cancels, the arrows icon restores the automatic name). The search box above filters rows by name.
Automatic mapping
The plan builds up as the client observes the settlement. You do not need to place each fence, building, tree, field, road, or production object manually.
Claim borders are included, along with extensions created using claim flags. As you visit more of the settlement, the saved plan becomes more complete.
Important: The plan reflects terrain, claim information, and objects the client has observed. It does not reveal unexplored areas or guarantee that every saved object is still present or unchanged.
Add and name an area
Use named areas to label parts of the settlement that have a specific purpose, such as Leather Storage, Wood, Metal, or Silk/Cloth.
- Open the Village Plan.
- Choose Add area.
- Mark the area you want to identify.
- Give it a descriptive name.
Named areas help distinguish storage and production zones even when the underlying objects look similar.
Rename a building or object
- Open the Village Plan.
- Select the building or supported object on the plan or from the object list.
- Choose Rename object and enter a name.
For houses, the name is also displayed above the building in the game world. This makes it easier to identify workshops and storage houses without opening the plan each time.
Quality information
Hearthborn connects the plan with information already recorded in the Quality Journal:
- Trees: show their recorded quality on the plan.
- Furnaces and smelters: show their recorded quality when available.
The plan does not invent or measure quality values on its own. If an object's quality is not in the journal, there may be no quality value to display.
Personal and village plans
Hearthborn automatically builds plans for both personal claims and villages, using the same mapping and object-recording features.
- Personal claims: You can create a plan for a claim you own. The client cannot grant plan access to other characters who merely have in-game permissions on that claim, because the server does not provide the ownership and permission details needed to distinguish those access levels. For plan access, the client can only distinguish owner from non-owner.
- Village claims: All village members can create a plan of their village. The plan fills in as members explore and observe its structures and terrain.
These restrictions concern access to plan creation, not a change to the game's underlying claim permissions.
Measure distances and areas
Select Measure tiles to measure a rectangular section of the plan in tiles. This is useful for checking the dimensions of a field, planning a building, or estimating the space available for a production area before construction.
Navigate and manage plans
- Switch between Personal claim and Village claim views.
- Switch between available map levels to inspect the plan at different levels.
- Use the searchable Object list to locate an observed object and center the plan on it.
- Rename and manage saved plans.
- Use Measure tiles to check dimensions on the map.
Export, share, and import
Plans can be exported in several ways:
- Excel: Export the plan for viewing and working with its information in a spreadsheet.
- HTML: Export a version that can be opened in a web browser.
- Plan file: Export the plan's data and send the file to another Hearthborn client. The recipient can import it and continue using the transferred plan in their client.
Excel and HTML are viewing/export formats; use the plan-file export and import workflow when you want another player to load and use the plan inside Hearthborn.
Notes and limitations
- The plan is based on observed and saved data, not a live view of the entire world.
- Some details may need to be observed again after the settlement changes.
- Displayed quality values depend on entries in the Quality Journal.
- The server does not expose the detailed personal-claim permissions required to give plan-creation access to permitted non-owners. Only the owner can create a personal-claim plan.
- All members of a village can create its village plan.
- Exporting or importing a plan does not change in-game claim ownership or permissions.